Organizing Your Cricut Tools and Materials: My Setup Tour
Organize your Cricut tools and materials with ease! See my craft room setup and get practical tips for keeping your Cricut space tidy and functional.
ORGANIZATION
6/2/20254 min read


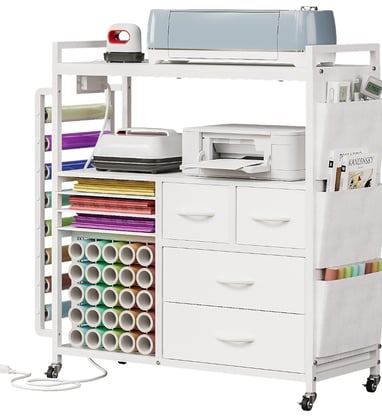
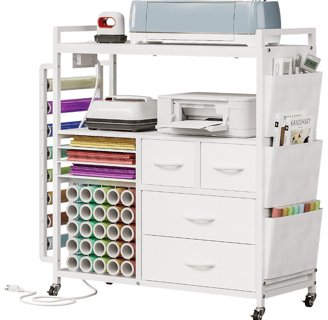
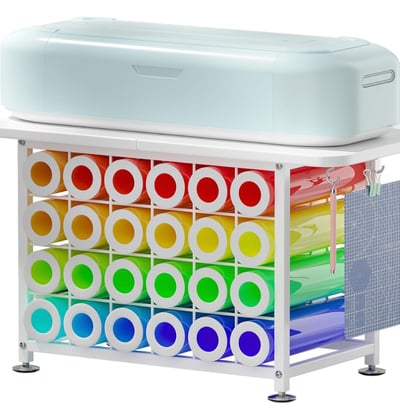
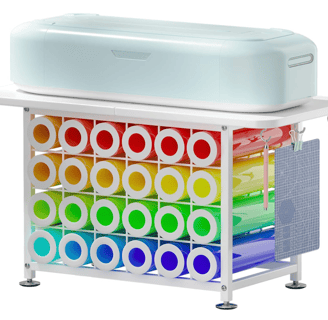
2. Vinyl Storage: Keeping It Rollin’
I used to have vinyl rolls falling out of drawers—until I found a game-changing solution: acrylic vinyl roll storage rack and over the door storage.
I sort my vinyl by type (permanent, removable, HTV) and color. Each roll is labeled using a wrapping paper holder, so I can grab what I need without digging.
Bonus Tip: Store smaller scraps in clear plastic sleeves within a binder. You’ll be amazed how much use you can get from offcuts! Just slip a piece of paper in the sleeve with the scraps labeled with the vinyl type.
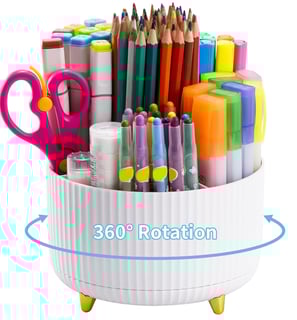
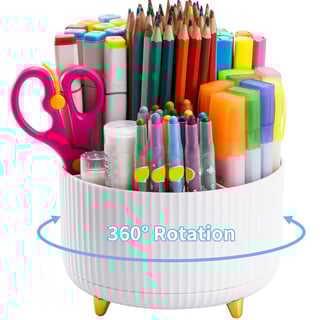
3. Tool Storage: Pen Holder Power
On my desktop, I placed a 360-degree rotating pen holder to hold all my weeding tools, scrapers, scissors, pens, and other tools.
It not only looks super satisfying, but it also keeps everything within arm’s reach. It even comes in several cheerful colors to brighten the space!
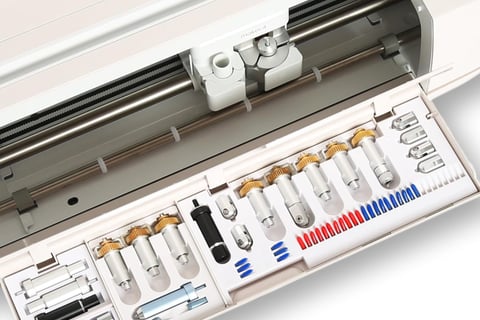
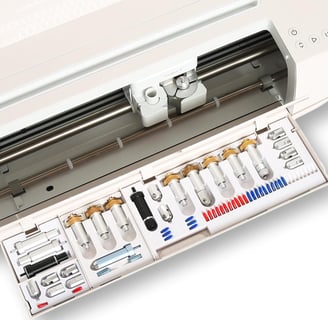
Blade storage: I purchased a tool organizer that fits within the cover of my cricut that is perfect for storing the blades right at your fingertips.
If you're anything like me, your Cricut crafting journey has probably come with a lot of tools, materials, and accessories. From blades to mats, vinyl rolls to weeding tools—before you know it, your workspace can turn into a cluttered mess. Trust me, I’ve been there.
Over time, I’ve found a system that not only keeps my space tidy but also fuels my creativity. Today, I’m giving you a full tour of my Cricut setup and sharing my best tips for organizing your tools and materials—without spending a fortune.
1. The Heart of the Setup: My Cricut Station
My Cricut Maker 3 sits proudly on a rolling craft cart that I picked up online. This cart has multi tiers, allowing me to keep the machine on top and store frequently-used supplies underneath. It’s mobile, so I can roll it into better lighting or tuck it away when I need more space. Another great cart option would be the Large Craft Organizer and Storage Rolling Cart by VENNQD.
There is also a great tabletop option complete with tool holder if your step-up does not allow for a separate cart option.
Tip: Use a power strip mounted to the back of the cart to keep cords tidy and accessible
4. Mat Storage: Flat, Clean, and Easy to Grab
Cricut mats can be a pain to store. I use a wall-mounted double hooks to keep mine upright and flat. Each hanger holds a different mat type: LightGrip, StandardGrip, FabricGrip, and StrongGrip.
Important: Always cover your mats with their protective film to keep them lint-free and lasting longer.
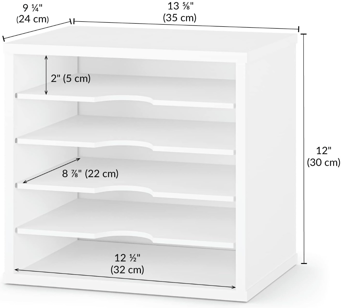
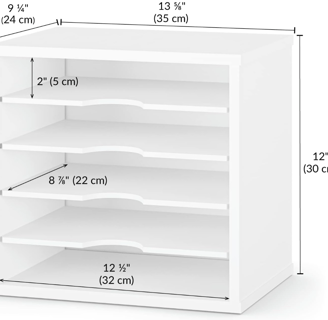
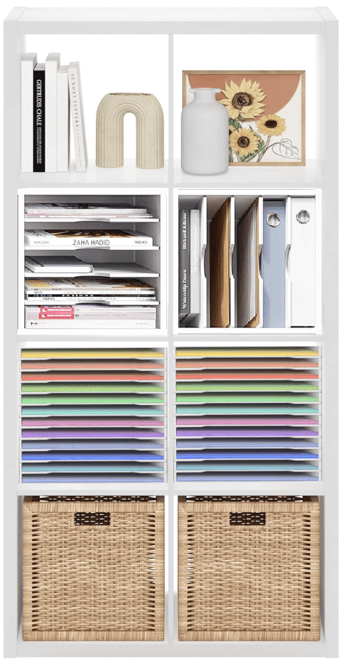
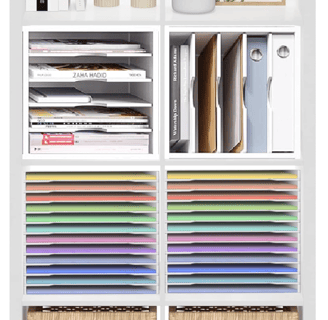
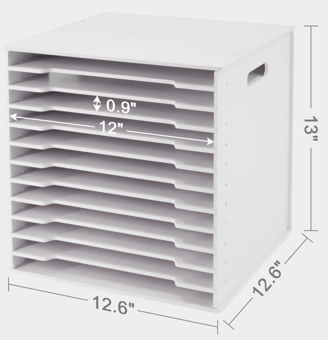
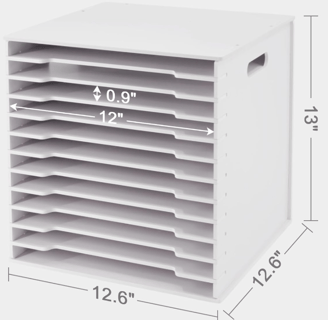
5. Paper, Cardstock, and Sublimation Blanks
For flat materials, I use a cube storage unit with insertable paper organizers in two sizes (13 tier unit with adjustable shelves and 5 tier unit with adjustable shelves). The paper storage cubes are sized perfectly to fit within the cube storage unit, and they have an endless variety of baskets and storage bins that you can add to the cubes for even more storage. I have one bin for cardstock, one for printable vinyl, one for transfer tape, and others for specialty papers and sublimation blanks.
I also keep a separate drawer just for sublimation mugs, coasters, and tumblers, so they stay safe from scratches and chips
6. Heat Press Storage: Safety First!
My EasyPress and mug press live on a heat-resistant silicone mat on a dedicated shelf. Nearby, I keep a small basket with heat-resistant tape, Teflon sheets, butcher paper, and pressing guides.
Tip: Always let your presses cool down fully before putting them away—especially if you're tight on space.
7. Digital Designs and Cut Files: Digital Organization Counts Too!
It's easy to hoard digital files, too. I organize my SVGs, PNGs, and mockups by theme (holidays, quotes, kitchen, etc.) using cloud storage with clear folder names and previews. I even use color-coded icons so I can spot them quickly.
Final Thoughts
Crafting should be joyful, not stressful—and having an organized Cricut setup makes a huge difference. Whether you're working out of a spare room, a corner of the kitchen, or a full craft studio, smart organization is possible with a little creativity and a few budget-friendly tools.
Let me know how you organize your space—drop a comment below or tag me on Instagram at @TagDesignsCo. I’d love to see your crafty corner!
I’ve linked all of the tools and products mentioned in this post in Our Favorite Crafting Tools & Must-Have Supplies — check it out!
Inspiration
Empowering crafters with tools and resources.
© 2025. All rights reserved.
Affiliate Disclosure
At TAG Designs Co, we believe in full transparency. Some of the links on this site are affiliate links, which means we may earn a small commission—at no extra cost to you—if you make a purchase through them. We only recommend products we genuinely use, love, and trust in our own crafting journey. These commissions help support the blog and allow us to keep sharing free tips, tutorials, and inspiration with our crafty community. 💛
Thanks for supporting what we do!